Tuesday, November 20, 2012

Core Hardware Options for ESX / ESXi Server


$vmkvsitools hwinfo -i
So, what else “vmkvsitools” can do?. Although, I haven’t finished yet exploring all the parameters, you can try some of the commands as I listed below :-

Usage: ‘vmkvsitools CMD option’

CMD: amldump, bootOption, hwclock, hwinfo, lsof, lspci, pci-info, pidof, ps, vdf, vdu, vmksystemswap, vmware
eg1. “$vmkvsitools CMD -h” -> get help
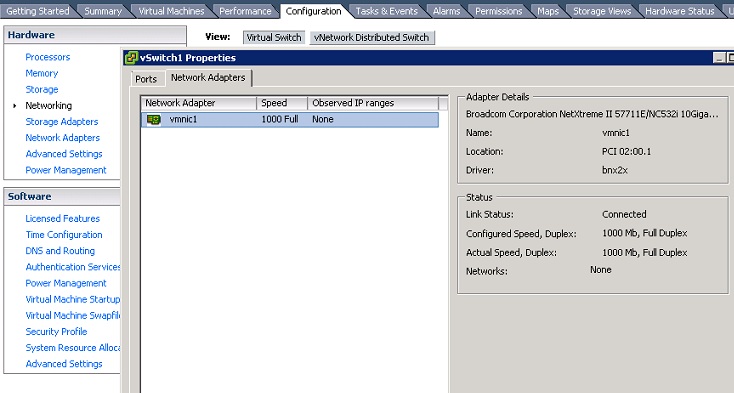
eg2. “$vmkvsitools hwinfo -p” -> print all pci device info present
eg3. “$vmkvsitools hwinfo -h” -> Print usage
eg4. “$vmkvsitools lspci -p” -> print details of pci device
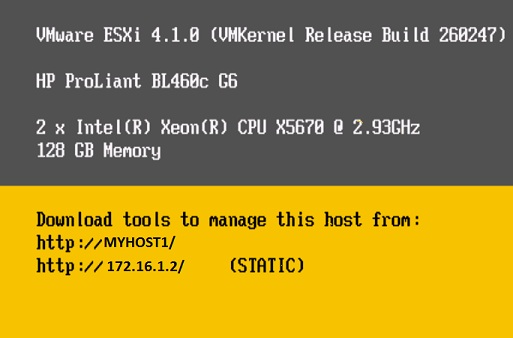
eg5. “$vmkvsitools vmware -v” vmkernel version
eg6. “$vmkvsitools vmware -l” Print release level
eg7. “vmkvsitools hwclock -d 10/07/2010 -t 00:33:00″ Set date & time
eg6. “vmkvsitools ps -c” Print process ID (PID) with verbose command aka ps auxwww


Well, just give a try because too much to explain here. Remember “$vmkvsitools CMD -h” for help.


How to connect the below window from command line ?


~#cd /usr/sbin...............>

/sbin # dcui/
What is amldump?

~ # amldump

Writing file DSDT.aml

Writing file FACS.aml

Writing file FACP.aml

Writing file SSDT.aml

Writing file MSDM.aml

Writing file HPET.aml

Writing file MCFG.aml

Writing file TAMG.aml

Writing file APIC.aml

~ #

Regulary which is used for ESX/ESXI Server in Core level for background process of Operating system
techsupport.sh
vmkdump_extract
amldump
ntpd
vmkerrcodeapply-host-profiles
vmkeventd
applyHostProfile
vmkfstools
esxtop 
vmkiscsi-tool
auto-backup.sh
esxupdate
partedUtil 
vmkiscsid
backup.sh
ethtool
pidof
chkconfig
firmwareConfig.sh
vmkmkdev
dcbd
ft-stats
randomSeed
vmkperfdcui
generate-certificates 
vmkramdisk
df 
hbrfilterctl
scantools
vmksystemswap
dmesg
sensord
vmtar
doat
hwclock
vmware-autostart.shhwinfo 
sfcbd
vmware-usbarbitratorshutdown.sh 
esxcfg-dumppart 
smbiosDump
vscsiStatsesxcfg-fcoe watchdog.sh
logchannellogger
storageRM
lspci 
tmpwatch.py
lsusb
traceroute
uptime
memstats 
vm-support
net-dvs
vmdumper
net-fence
vmfs-support
net-lbt
vmkbacktrace
netlogond
vmkchdev
Session.py 
vmkdevmgr
ntp-keygen 
localcli 
statedumper
vmkload_mod
bootOption
fdisk 
vmkmicrocode

Wednesday, November 14, 2012

Run Hardware Diagnostic tests

Most servers are shipped with a hardware diagnostics CD, although other hardware vendors may choose to install a hidden utility partition located on your hard drive.
Note: If you are not experienced with computers or have any concerns, please contact your hardware vendor.
You can diagnose hardware related problems on your server by booting from the diagnostic CD or choosing Diagnostics from the boot device list.
These diagnostic tools allow you to:
  • Check the hardware configuration and verify that it is functioning correctly.
  • Test individual hardware components.
  • Diagnose hardware-related problems.
  • Obtain a complete hardware configuration.
When testing, if a component failure is detected, make note of any error code(s) and contact the hardware vendor.

Check your memory

Note: This process requires downtime on your ESX/ESXi host for up to 48 hours. In most cases, contacting your hardware vendor for a diagnostic utility as mentioned above should be sufficient in testing your hardware. VMware does not endorse or recommend any particular third party utility.  However, there are third party options available to test your memory.
To test your memory:
  1. Download memtest86+ from http://www.memtest.org/.
  2. Extract the ISO image from the .gz or .zip archive.
  3. Burn the image to CD.
  4. Boot your ESX/ESXi host from the CD.
  5. The memtest goes through each memory bank and checks for errors.

    Note: If memtest86+ does not run on your hardware, contact your vendor for their memory test utility. 
Ensure your server conforms to Non-Uniform Memory Access (NUMA) rules and regulations
Notes:
  • If you are not experienced with computers or have any concerns, please contact your hardware vendor.
  • Problems related to NUMA usually occur following a RAM upgrade or after an ESX/ESXi Server host installation.
You might see an error such as the following:

The BIOS reports that NUMA node 1 has no memory. This problem is either caused by a bad BIOS or a very unbalanced distribution of memory modules. 
NUMA is a system where each processor has separate memory. The separate memory helps to avoid a performance hit when several processors attempt to address the same memory.
The main requirement is that a similar amount of memory is installed beside each processor. If the amount of memory installed beside each processor is not not similar, it is unbalanced and you might experience performance problems.For more information, see ESX Server Memory Management on Systems with AMD Opteron Processors (1570).


More information on NUMA is also available in the Resource Management Guide.

Run the VMware CPU Identification Utility

To ensure that your CPU(s) are being detected as expected you can use the VMware CPU Identification Utility. You can download the utility at VMware Shared Utilities. This tool helps you ensure that the ESX host is detecting and reporting your CPU(s) correctly.
When the the VMware CPU Identification Utility has been downloaded, the cpuid.iso image can be used to create a bootable CD that aids in processor and feature identification. The tool displays Family/Model/Stepping information for the CPUs detected, and hexadecimal values for the CPU registers that identify specific CPU features. The hexadecimal register values are then interpreted to indicate whether the CPUs support features like, 64bit, SSE3, and nX/xD.
The following is sample output:
Reporting CPUID for 2 logical CPUs...
All CPUs are identical
Family: 0f Model: 04 Stepping: 1
ID1ECX ID1EDX ID81ECX ID81EDX
0x0000641d 0xbfebfbff 0000000000 0x20100000Vendor : Intel
Processor Cores : 1
Brand String : " Intel(R) Xeon(TM) CPU 2.80GHz"
SSE Support : SSE1, SSE2, SSE3
Supports NX / XD : Yes
Supports CMPXCHG16B : Yes
Hyperthreading : Yes
Supports 64-bit Longmode : Yes
Supports 64-bit VMware : No
Additional Information

In addition make sure that you are meeting the minimum system requirements for your ESX/ESXi.  For more information see Minimum requirements for installing ESX/ESXi (1003661).For more information about decoding machine check exceptions, see  Decoding Machine Check Exception (MCE) output after a purple screen error (1005184)

Hardware & VCLI Commands

There might be a few reasons that you would need to do this. But if you need to locate the Serial Number of server or Service Tag of your Dell server you can do this from the service console command line.  In the past I have needed this to schedule service and also to confirm the identity of a server for the Vendor that was on site. In case you do not have a database to reference or maybe someone mistyped the digits you can always fall back to this method.

[root@host name]#  /usr/sbin/dmidecode |grep -A4 “System Information”

I have grabbed a list of the new commands added to vCLI 4.1, these command will help narrow the gap that had existed between what you could run on the ESX console (COS) and what you could do via the vCLI with an ESXi host. Notice the part at the end where it lists some of the commands that cannot be executed against a vCenter server for a host in lock down mode.
  • vicfg-hostops – Allows you to examine, stop, and reboot hosts and to instruct hosts to enter and exit maintenance mode.
  • vicfg-authconfig – Allows you to add an ESX/ESXi host to an Active Directory domain, remove the host, and list Active Directory domain information.
  • vicfg-ipsec – Supports IPsec setup.
vSphere CLI 4.1 also includes the following new functionality:
  • The following options have been added to esxcli:
    • esxcli swiscsi session – Manage iSCSI sessions.
    • esxcli swiscsi nic – Manage iSCSI network interfaces.
    • esxcli swiscsi vmknic – List VMkernel network interfaces available for binding to particular iSCSI adapter.
    • esxcli swiscsi vmnic – List available uplink adapters for use with a specified iSCSI adapter.
    • esxcli vaai device – Display information about devices claimed by the VMware VAAI (vStorage APIs for Array Integration) Filter Plugin.
    • esxcli corestorage – List devices or plugins. Used in conjunction with hardware acceleration.
    • esxcli network – List active connections or list active ARP table entries.
    • esxcli vms – List and forcibly stop virtual machines that do not respond to normal stop operations.
  • Some of the parity issues between vSphere CLI and the ESX service console have been resolved.
  • You can now run vCLI commands using SSPI (--passthroughauth) against both vCenter Server and ESX/ESXi systems.
  • Lockdown mode allows vSphere administrators to block direct access to ESXi systems. With lockdown mode enabled, all operations must go through a vCenter Server system. The following commands cannot run against vCenter Server systems and can therefore not be used in lockdown mode:
    • vicfg-snmp
    • vifs
    • vicfg-user
    • vicfg-cfgbackup
    • vihostupdate
    • vmkfstools
    • esxcli
    • vicfg-ipsec
  • If you want to run these commands against an ESXi system, turn off lockdown mode using the vSphere Client.

Tuesday, November 13, 2012

Hardware Issues for ESX / ESXI Server


If you are using ESX 4.0 (Classic) then try running following command on your esx server  :-   #dmidecode > out.txt or if you have ESXi 4.0 then try this command #smbiosDump > out.txt


In dimidecode and smbiosdump output,  you will know in which slot memory is installed and also size of the memory in each slot. 


I am not sure how to check failed memory but in demidecode and smbiosdump output, Their is property like Error Info.. Check that property in your scenario.

How to Check the pci Information in ESX/ESXI Servers
Use the VMware provided tool “vmkvsitools“. Go to the console and issue the command “vmkvsitools lspci“. This command returns a list of all PCI devices in your system, equal to just running the “lspci” command, but adds the VMware device name at the end of each line


Contents:
  • Overview of Upgrading NIC drivers in vSphere 4
  • Steps to Update NIC drivers in vSphere 4
  • Conclusion
Overview of Upgrading NIC drivers in vSphere
With our ever growing technology infrastructure we get to play the update and upgrade games so everything can talk to everything else. Even virtualization does not free us from the fun exercise of upgrading drivers and firmware levels. If, for whatever reason, you find yourself asking "how do I upgrade the NIC drivers on a vSphere host?" The steps below should provide enough information to get you through the process.

Please note that these steps were performed on a Windows 2008 R2 Enterprise server and were ran against a VMware ESX 4.1.0 build 260247 vSphere host using the VMware vSphere CLI 4.1.0 build 254719 tool on December 8th, 2010. These steps should work for any version of vSphere 4.x and vCLI 4.x but read the documentation on the 'vihostupdate' command from VMware's website first to verify the process has not changed. If you are running the vSphere CLI from a *nix host please read the documentation to verify the steps outlined will work for you before attempting them.
The documentation is located here: http://www.vmware.com/support/developer/vcli/.
A reboot of the VMware vSphere ESX / ESXi host is required before the changes will take effect. The reboot will not occur automatically and should be performed at step 13.

These instructions are not meant to be exhaustive and may not be appropriate for your environment. Always check with your vendors for the appropriate steps to manage your infrastructure.


Steps to Update NIC drivers in vSphere 4
  1. Install the vSphere Command Line Interface (vSphere CLI) on a machine that has SSH access to your vSphere ESX/ESXi host's service console.
    The Installer is located here: http://www.vmware.com/download/download.do?downloadGroup=VCLI41
    VMware recommends installing the vSphere CLI on your vSphere vCenter Server as it typically has access to your vSphere hosts but, it does not have to be on a vCenter Server.
  2. Verify your version of ESX and/or ESXi.
    For an ESX host, SSH to the service console and perform the following:
    [root@MYHOST1 ~]# vmware -v
    VMware ESX 4.1.0 build-260247

    For an ESXi host, connect to the console with a KVM, lights out manager, or other management tool and view the home screen:

    vSphere ESXi 4.1.0 home screen showing version and build numbers.
  3. Verify the NIC type you are running and the driver name.
    From a vCenter client, change your view to Hosts and Clusters.

    Selecting Hosts and Clusters view from the vSphere Client

    Expand the cluster the host is in and select the vSphere Host you want to upgrade. Click on the configuration tab, then networking, and click properties next to a NIC (in Virtual Switch or Distributed Switch view). The name of your network adapter is located in the Network Adapters tab and the Adapter Details pane. The name of the driver is in the driver field. From this example the name of the NIC is Broadcom NetXtreme II 57711E and the driver is bnx2x.

    Network adapter properties showing NIC type and driver name.
  4. Place your host in maintenance mode through the vSphere Client and wait for all virtual machines to be migrated off the host before continuing.

  5. Verify the current running version of your drivers.
    For an ESX host, SSH to the service console and perform the below command. Replace "bnx2x" with your driver name from step 3 (above). The current version is the driver with the text "installed" in the second field. From this example the "bnx2x_400.1.54.1" driver is the current version.
    [root@MYHOST1 ~]# esxupdate query --vib-view | grep bnx2x
    rpm_vmware-esx-drivers-net-bnx2x_400.1.45.20-1.0.7.193498@x86_64     retired
    rpm_vmware-esx-drivers-net-bnx2x_400.1.45.20-2vmw.1.9.208167@x86_64     retired
    rpm_vmware-esx-drivers-net-bnx2x_400.1.54.1.v41.1-1vmw.0.0.260247@x86_64     installed
    rpm_vmware-esx-drivers-net-bnx2x_400.1.45.20-2vmw.2.17.261974@x86_64     retired

  6. Download the appropriate driver for your host's NIC and vSphere ESX / ESXi version fromhttp://downloads.vmware.com/d/info/datacenter_downloads/vmware_vsphere_4/4#drivers_tools. You may have to expand the "Driver CDs" menu to view all downloads.
  7. Copy the data from the CD/offline-bundle/ folder to the machine that you installed the vSphere CLI on.
    Depending on your network adapter and the types of drivers available, you may have 1 to many zip files in the offline-bundle folder. Your drivers may be a different name and version than what is shown below.

    Example of the driver bundles available in the offline-bundle folder..
  8. Run the vSphere CLI and change to the directory that you saved the offline-bundle zip files to using the "cd" command.
  9. Verify the offline-bundle package you downloaded is valid for your system. Make sure to change the file specified after "--bundle" to the zip file that corresponds to the driver you discovered from step 3 (above). (Time saving tip: you should be able to tab complete the driver name.)
    C:\drivers\offline-bundle>vihostupdate.pl --server 172.16.1.2 --scan --bundle BCM-bnx2x-1.60.50.v41.2-offline_bundle-325733.zip
    Enter username:
    Enter password:
    The bulletins which apply to but are not yet installed on this ESX host are listed.

    ---------Bulletin ID-------------------------Summary-----------------
    BCM-bnx2x-1.60.50.v41.2     bnx2x: net driver for VMware ESX

    If you receive a message stating there are no bulletins which apply to your system then you have either grabbed the wrong driver cd or your system is already up to date.
  10. Install the offline-bundles which apply to your system. It is possible to define the username and password on the command line or through a configuration file. Read the vSphere Command-line reference document's section titled vSphere CLI Connection Options for more information.
    C:\drivers\offline-bundle>vihostupdate.pl --server 172.16.1.2 --install --bundle BCM-bnx2x-1.60.50.v41.2-offline_bundle-325733.zip
    Enter username:
    Enter password:
    Please wait patch installation is in progress ...
    The update completed successfully, but the system needs to be rebooted for the changes to be effective.

    The driver install typically takes about a minute but could be faster or slower depending on your system configuration.
  11. Repeat steps 9 and 10 as necessary for any remaining network drivers.
  12. Verify the drivers installed correctly.
    For an ESX host, SSH to the service console and perform the below command. Be sure to replace "bnx2x" with your driver name from step 3 (above). You should see a driver (or drivers) with a status of "pending,installed". In this example the "bnx2x_400.1.60.50" driver was installed over the old "bnx2x_400.1.54.1" driver.
    [root@MYHOST1 ~]# esxupdate query --vib-view | grep bnx2x
    rpm_vmware-esx-drivers-net-bnx2x_400.1.45.20-1.0.7.193498@x86_64     retired
    rpm_vmware-esx-drivers-net-bnx2x_400.1.45.20-2vmw.1.9.208167@x86_64     retired
    rpm_vmware-esx-drivers-net-bnx2x_400.1.45.20-2vmw.2.17.261974@x86_64     retired
    cross_vmware-esx-drivers-net-bnx2x_400.1.60.50.v41.2-1vmw.0.0.00000     pending,installed
    rpm_vmware-esx-drivers-net-bnx2x_400.1.54.1.v41.1-1vmw.0.0.260247@x86_64     retired

    If the new driver version does not appear it is possible the driver install failed from step 10 or the wrong driver was chosen for installation.
  13. Reboot the newly upgraded host through the vSphere Client.
  14. When the host is online, verify the new drivers are installed and running.
    For an ESX host, SSH to the service console and perform the below command. Be sure to replace "bnx2x" with your driver name from step 3 (above). You should see a driver (or drivers) with a status of "installed". In this example the "bnx2x_400.1.60.50" driver was installed successfully and is running after the reboot.
    [root@USSLTCHER0049 ~]# esxupdate query --vib-view | grep bnx2x
    rpm_vmware-esx-drivers-net-bnx2x_400.1.45.20-1.0.7.193498@x86_64     retired
    rpm_vmware-esx-drivers-net-bnx2x_400.1.45.20-2vmw.1.9.208167@x86_64     retired
    rpm_vmware-esx-drivers-net-bnx2x_400.1.45.20-2vmw.2.17.261974@x86_64     retired
    cross_vmware-esx-drivers-net-bnx2x_400.1.60.50.v41.2-1vmw.0.0.00000     installed
    rpm_vmware-esx-drivers-net-bnx2x_400.1.54.1.v41.1-1vmw.0.0.260247@x86_64     retired

Conclusion
Following the above process you should be able to successfully upgrade the NIC drivers for your vSphere 4 ESX / ESXi hosts. Always be sure to read the release details of your drivers before download and installing them. If you have any problems updating your drivers you should search VMware KB articles related to your setup or contact VMware for assistance. These instructions could also be used to upgrade other drivers such as HBA's, graphics accelerators, etc.

Process-2

Update Intel NIC Drivers on ESX 4.1

I Installed an IBM x3650 M3 the other day. During the installation the additional Intel NIC was not recognized by default in the ESX Host.
This I could see in two different ways, from the output on the console
msaidelk@esx9:~$ sudo lspci | grep Ethernet
0b:00.0 Ethernet controller: Broadcom Corporation Broadcom NetXtreme II BCM5709 1000Base-T (rev 20)
0b:00.1 Ethernet controller: Broadcom Corporation Broadcom NetXtreme II BCM5709 1000Base-T (rev 20)
10:00.0 Ethernet controller: Broadcom Corporation Broadcom NetXtreme II BCM5709 1000Base-T (rev 20)
10:00.1 Ethernet controller: Broadcom Corporation Broadcom NetXtreme II BCM5709 1000Base-T (rev 20)
15:00.0 Ethernet controller: Intel Corporation Unknown device 1516 (rev 01)
15:00.1 Ethernet controller: Intel Corporation Unknown device 1516 (rev 01)
1f:00.0 Ethernet controller: Intel Corporation Unknown device 1516 (rev 01)
1f:00.1 Ethernet controller: Intel Corporation Unknown device 1516 (rev 01)

And the GUI also only recognized the first 4 Broadcom NICs (instead of 8)
NICS
I posted an article about IBM x3650 M3 Does not Recognize NICs a while back - but as you can see from the output above they are recognized in hardware - just ESX does not know how to deal with them.
I downloaded the driver from VMware's Site and extracted the files from the ISO image and the file I am interested in is in the offline-bundle folder
image
The host has to be in Maintenance mode for the patch update.
Install through vCLI
C:\Program Files (x86)\VMware\VMware vSphere CLI\bin>vihostupdate.pl --server esx9.maishsk.local --username root  -i -b \\vc\VMware\ESX\INT-intel-lad-ddk-igb-2.4.10-offline_bundle-320657.zip
After installation
msaidelk@esx9:~$ sudo lspci | grep Ethernet0b:00.0 Ethernet controller: Broadcom Corporation Broadcom NetXtreme II BCM5709 1000Base-T (rev 20)
0b:00.1 Ethernet controller: Broadcom Corporation Broadcom NetXtreme II BCM5709 1000Base-T (rev 20)
10:00.0 Ethernet controller: Broadcom Corporation Broadcom NetXtreme II BCM5709 1000Base-T (rev 20)
10:00.1 Ethernet controller: Broadcom Corporation Broadcom NetXtreme II BCM5709 1000Base-T (rev 20)
15:00.0 Ethernet controller: Intel Corporation 82580 Gigabit Network Connection (rev 01)
15:00.1 Ethernet controller: Intel Corporation 82580 Gigabit Network Connection (rev 01)
1f:00.0 Ethernet controller: Intel Corporation 82580 Gigabit Network Connection (rev 01)
1f:00.1 Ethernet controller: Intel Corporation 82580 Gigabit Network Connection (rev 01)
Host rebooted and it comes up with all NICs recognized.
image

Monday, November 12, 2012

Basics Trouble shooting on VMware ESX/ESXi

1) What is management service service used for ESX/ESXi Server?
2) What is Watchdog ?
3) What is Host Agent ?

I am not able to create the VM's in  running ESX / ESXi Server, But i have some VM in ESX Server which is Running with out Any issue .

How to Solve this issue ?
[root@server]# service mgmt-vmware restart
Stopping VMware ESX Server Management services:
VMware ESX Server Host Agent Watchdog [ OK
 ]
VMware ESX Server Host Agent [ OK ]
Starting VMware ESX Server Management services:
VMware ESX Server Host Agent (background) [ OK ]
Availability report startup (background) [ OK ]
[root@server]# service vmware-vpxa restart
Stopping vmware-vpxa: [ OK ]
Starting vmware-vpxa: [ OK ]
[root@server]#

Monday, November 05, 2012

How to force to mount a datastore with vSphere without resignature


It describes how a datastore can be mounted and unmounted, while not changing its UUID. This has to be done e.g. if a LUN is discovered as snapshot LUN by the ESX host. In the SAN guide published by VMware this is also mentioned in page 74:
1. Log in to the vSphere Client and select the server from the inventory panel.
2. Click the Configuration tab and click Storage in the Hardware panel.
3. Click Add Storage.
4. Select the Disk/LUN storage type and click Next.
5. From the list of LUNs, select the LUN that has a datastore name displayed in the VMFS Label column and
click Next.
The name present in the VMFS Label column indicates that the LUN is a copy that contains a copy of an
existing VMFS datastore.
6. Under Mount Options, select Keep Existing Signature.
7. In the Ready to Complete page, review the datastore configuration information and click Finish.
But there are some pitfalls: If a datastore was already mounted by an ESX host inside a cluster, the vCenter is aware of this and hides the datastores in the “Add storage” dialog. Reason:
“When one ESX 4.0 host force mounts a VMFS datastore residing on a LUN which has been detected as a snapshot, an object is added to the datacenter grouping in the vCenter database to represent that datastore. When a second ESX 4.0 host attempts to do the same operation on the same VMFS datastore, the operation fails because an object already exists within the same datacenter grouping in the vCenter database. Since an object already exists, vCenter Server does not allow mounting the datastore on any other ESX host residing in that same datacenter.”
Further it may happen that you have some freespace left on the volume presented by the storage. In this case after the point 6 of the description above you are asked to create a new VMFS datastore (as second partition) or to expand the existing one. There is no other possibility and if you don’t want to do this you can’t complete the wizard.
So you are forced to this as described in the knowledge base article above in workaround B (By connecting directly to the ESX host service console):
1. Log in as root to the ESX host which cannot mount the datastore using an SSH client.
2. Run the command:
esxcfg-volume -l
The results appear similar to:
VMFS3 UUID/label: 4b057ec3-6bd10428-b37c-005056ab552a/ TestDS
Can mount: Yes
Can resignature: Yes
Extent name: naa.6000eb391530aa26000000000000130c:1 range: 0 – 1791 (MB)
Record the UUID portion of the output. In the above example the UUID is 4b057ec3-6bd10428-b37c-005056ab552a.
Note: The Can mount value must be Yes to proceed with this workaround.
3. Run the command:
esxcfg-volume -M
Where the is the value recorded in step 3.
Note: If you do not wish the volume mount to persist a reboot, the -m switch can be used instead.
Example2:
To mount the VMFS volume on each of the other ESX/ESXi hosts, use one of these options:
  1. By connecting to the ESX host with vSphere Client:
    1. Connect vSphere Client directly to the second ESX host as root.
    2. Click the Configuration tab.
    3. Click Storage.
    4. Click Add Storage....
    5. Complete the wizard to force mount the appropriate VMFS volume which is being detected as a Snapshot LUN.
       
  2. By connecting directly to the ESX host service console:
    1. Log in as root to the ESX host which cannot mount the datastore using an SSH client. For more information, see Unable to connect to an ESX host using Secure Shell (SSH) (1003807).
      Note: All of the commands listed are available in ESXi via the vSphere CLI.
    2. Run the command:

      # esxcfg-volume -l
      The results appear similar to:


      VMFS3 UUID/label: 4b057ec3-6bd10428-b37c-005056ab552a/ TestDS
      Can mount: Yes
      Can resignature: Yes
      Extent name: naa.6000eb391530aa26000000000000130c:1 range: 0 - 1791 (MB)
      Record the UUID portion of the output. In the above example the UUID is 4b057ec3-6bd10428-b37c-005056ab552a.
      Note: The Can mount value must be Yes to proceed with this workaround.
      Note: The esxcfg-volume command has been depreciated in ESXi 5.0 in favor of the esxclicommand. For more/related information, see vSphere handling of LUNs detected as snapshot (1011387).
       
    3. Run the command:

      # esxcfg-volume -M
      Where the  is the value recorded in step 3.

      Note: If you do not wish the volume mount to persist across a reboot, the -m switch can be used instead.
       
  3. By relocating the ESX hosts within the vCenter. Alternatively, you can move each ESX host to its own datacenter before starting the Add Storage operation.
    Warning: This option may be disruptive in a production environment, especially if there are more than two hosts in the same datacenter.

Note: To view the datastores again in vCenter Server, you may have to perform a rescan of the storage adapters on all ESX/ESXi hosts that the datastore is presented to or a refresh of the storage view.

acm bottom ad